The ultimate Windows app launcher
Ah, the morning ritual: Once you’ve booted up your computer, it’s time to open all those application windows you need to get work done. You might want to position them just so, especially if you use a variety of apps or rely on multiple displays in your workflow.
But wait: Computers are designed to automate repetitive tasks! Isn’t there be a better way to do this?
The answer is yes — and Microsoft’s new Workspaces PowerToy is how to make it happen. With a few fast clicks, the tool empowers you to pull up any specific group of application windows you need and put them exactly where you want them on your desktop.
It even supports multiple monitors for people who have especially complex desktop setups. If Microsoft were rolling this out as a feature in the next version of Windows, PC users everywhere would be excited! But it’s a free download today and most PC owners don’t even realize it’s available for the taking.
The Workspaces tool is part of Microsoft’s free PowerToys package for Windows 10 and Windows 11. You can download it from the Microsoft Store or Microsoft’s website. (Microsoft added the Workspaces utility in PowerToys version 0.84, released on Sept. 3. If you have an older version, you’ll want to launch “PowerToys” from the Start menu and use the “Check for updates” button on the General tab.)
Once you have PowerToys in place, the real fun begins.
Looking for more useful Windows tips and tricks? My free Windows Intelligence newsletter delivers all the best Windows tips straight to your inbox — along with free in-depth Windows Field Guides as a special welcome bonus!
Create your custom Windows workspace
Once you’ve opened up PowerToys at least once to confirm it has all the required permissions — you can start using the new Workspaces feature by pressing Windows+Ctrl+`. (That last character is known as the “grave accent” — it’s the key above the Tab key on your keyboard.)
(You can tweak this keyboard shortcut if you like. Launch PowerToys, select “Workspaces” in the sidebar, and change the activation shortcut.)
To save a workspace of windows, click the “Create Workspace” button. Now, create the “workspace” you want to use by opening windows, closing windows, and positioning everything where you want on your screen.
Chris Hoffman, IDG
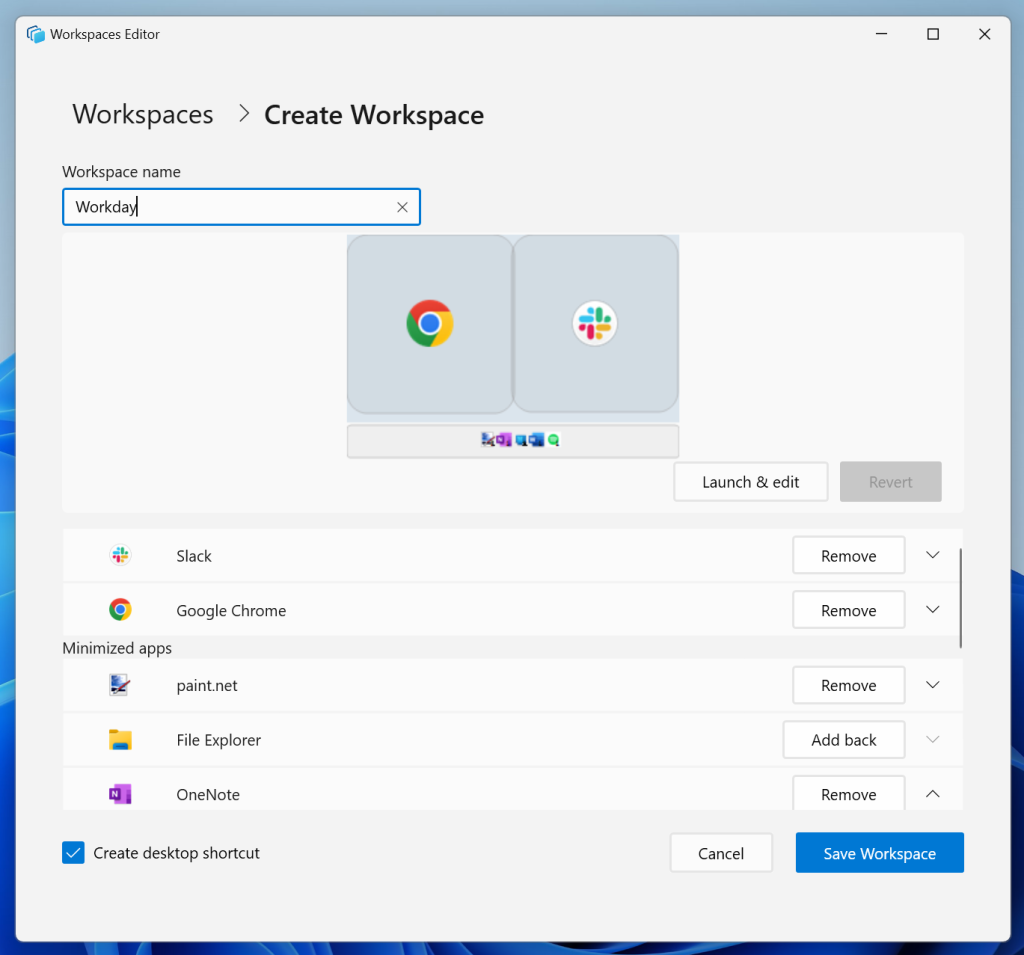
PowerToys will remember everything — which applications are open, which windows are positioned where, and even which applications are minimized. When you’re done, click “Capture.” You’ll see a preview of what the Workspaces tool remembers.
You can easily edit this list: To remove an application you don’t want to associate with a particular workspace, just click the “Remove” button next to it.
When you’re happy with your workspace, give it a name using the “Workspace name” box at the top of your screen. Then, consider checking the “Create desktop shortcut” box to make your workspace easier to launch. Finally, click “Save Workspace.”
Chris Hoffman, IDG
Launch a workspace of Windows apps
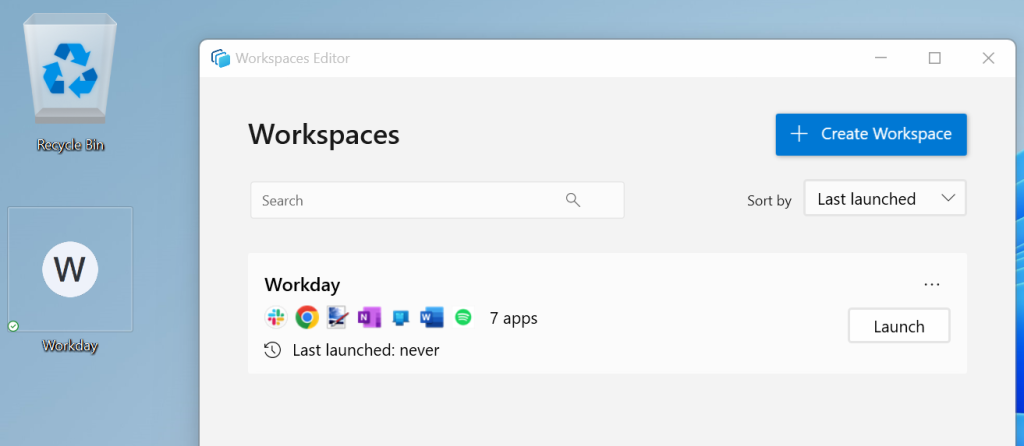
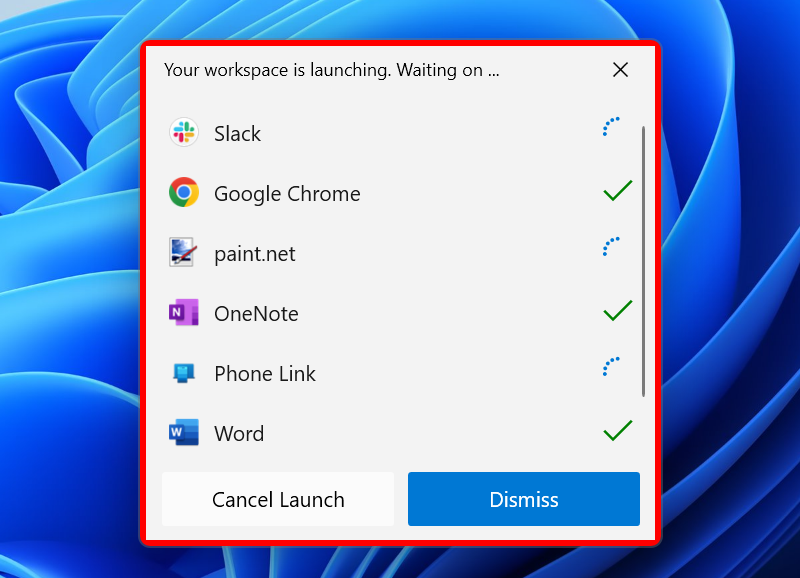
After you’ve saved your preferred setup, you have two options to launch it. The easiest is with that desktop shortcut you created just a moment ago. You just double-click the shortcut on your desktop and Workspaces will get to work, opening applications and positioning all those windows for you.
You can also open the Workspaces window by pressing Windows+Ctrl+` and then using the “Launch” button to launch any of your saved workspaces.
Chris Hoffman, IDG
Personally, I prefer the desktop shortcut. When you boot your computer and it’s time to work, you can quickly double-click the shortcut and have Workspaces take it from there.
(Don’t see the desktop shortcut? Right-click an empty spot on your desktop and select View > Show desktop icons to toggle desktop icons on and off.)
Chris Hoffman, IDG
Tweak your workspace with advanced arguments
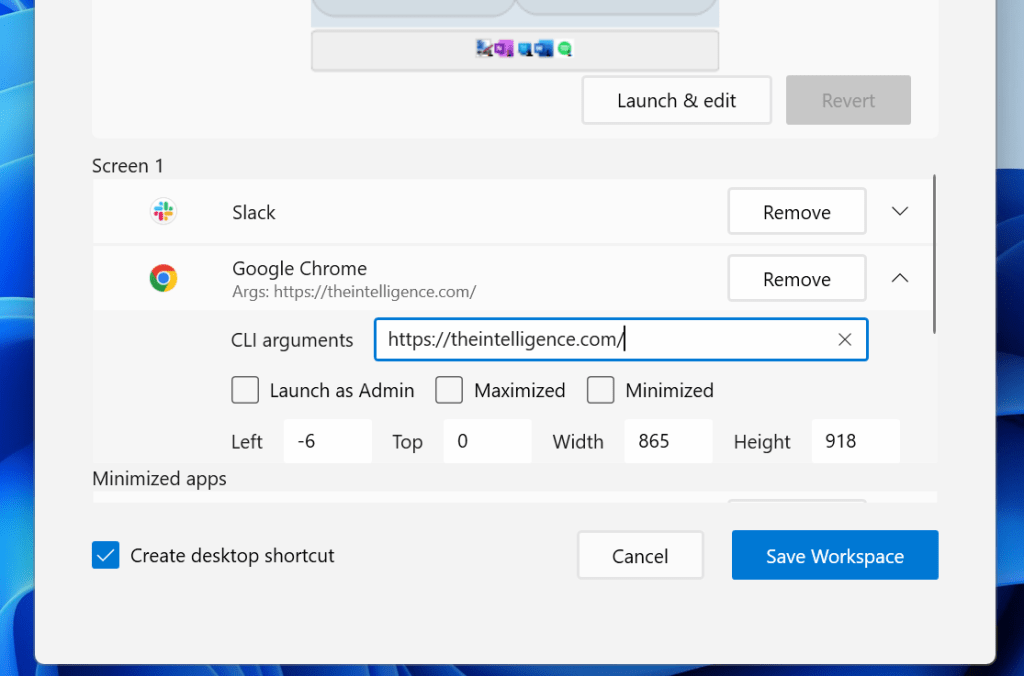
If you want to take your Windows workspace setup to even more advanced heights, you can dig into the feature’s app-specific command-line arguments. (These are why Microsoft is positioning PowerToys Workspaces as a tool for developers and not just regular business users!) When you’re creating or editing a workspace in the Workspaces window, you can click an application in the list, and you’ll see a “CLI arguments” field.
You can specify any command-line arguments here and PowerToys Workspaces will use them when launching the applications in that workspace.
Take Google Chrome, for example: You could specify a web address like to launch that specific web page when your workspace opens. Or with a program like Microsoft Word or Excel, you could specify the path to a document or spreadsheet on your computer to launch it.
Chris Hoffman, IDG
The available options depend on the command-line switches the application in question supports, so you might have to do some digging to uncover all the available options for any given program.
A Windows workspace warning
When you use PowerToys Workspaces, you could encounter one big problem: The system works best when you have no application windows open and you’re starting from a clean, empty workspace. If you already have some windows open, its behavior can be a little unpredictable.
Here’s the issue: Let’s say you have an app open and you try to launch it again from your Start menu. What happens? It depends on the application. For some applications — like Google Chrome and Microsoft Word — Windows will open an additional window. For other applications — like Spotify or Microsoft To Do — Windows will “reuse” the open application window, bringing it into focus.
That’s because PowerToys Workspaces functions by launching an application — just like you’d launch it from your Start menu — and then moving its window to a configured position on your desktop.
So, if you already have a Chrome browser window open and you launch a workspace that has a Chrome window, you’ll get a new Chrome window in the configured location. For other applications, PowerToys will reposition the current window.
For predictable behavior, consider closing all your open applications or just using PowerToys Workspaces when you first sign into your computer and have a clean desktop.
Other useful Windows workspace systems
Windows has lots of other ways to organize the apps you’re using, including the powerful Snap feature for organizing windows and Task View, which lets you organize groups of open windows into different virtual desktops. (Unfortunately, Workspaces isn’t integrated with those Task View virtual desktops.)
For more useful PowerToys, check out FancyZones, which provides extra organization powers for your open windows. And I recommend checking out the Always On Top PowerToy; it offers an easy way to make any window “always on top” of other windows, which is can be helpful in various workflows.
Want more? Dig into this list of 10 excellent PowerToys you should use on Windows. There are many powerful utilities included in this power-user-focused free download from Microsoft; this new Workspaces addition is merely the latest in a long list of worthwhile options.
Discover useful Windows tools like this one with my free Windows Intelligence newsletter. You’ll get all the best Windows tips straight into your inbox — and you’ll get free in-depth Windows Field Guides just for subscribing!


