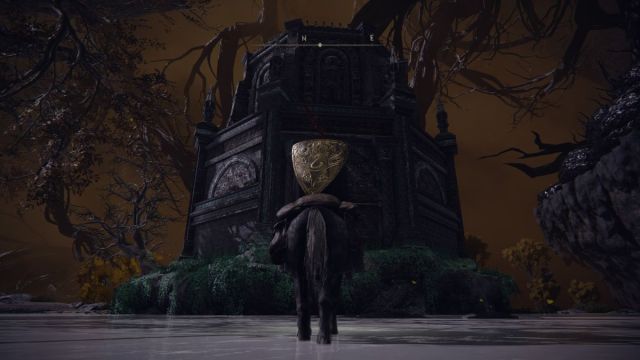
How to get into the Elden Ring Walking Mausoleums (turtle towers)
Note that the Elden Ring Walking Mausoleums are found as quickly as the first area, but if you want to go in fresh. Skip away!
Here’s a buffer for you:
Okay, ready?
To get into the Elden Ring Walking Mausoleums, you’ll need to bring them down to your level.
So, for many hours (like 30), I thought you had to run up some mountain somewhere and then jump down on it. Some will require you to do that while others are more straightforward.
How to get into every Walking Mausoleums in Elden Ring
There are a total of seven Walking Mausoleums in the base game of Elden Ring. Here they are as follows from their closest Site of Grace:

Isolated Merchant’s Shack (Limgrave)
Just a bit northwest of spawning here, you’ll see your first Mausoleum roaming around. Carefully remove the barnacles on its legs. They appear more like skull clusters. You will do so by attacking them. Upon cleaning up enough of them, the Mausoleum will come down, granting you entry inside the tomb.

Gate Town North (Liurnia of the Lakes)
Go north from hear by the cliffside to find the Mausoleum with a bell. This one requires you to jump onto the grassy part of its body to bring it down. You’ll need to wait until it gets close enough to the cliffs you can scale to climb aboard. You can also use the spirit spring to jump onto it if you’re scared of falling to your death.
Once on top, clean up the barnacles on its body to bring it down and open the door.
Mausoleum Compound (Liurnia of the Lakes)
There are two Mausoleums here which will require you to hit the barnacles on their legs to bring them down. It’s straightforward, but they do get agitated and start jump-stomping. When you see them do so, make sure to get back so you won’t get crushed.

Apostate Derelict (Consecrated Snowfield)
South of this Site of Grace will be the next wandering Mausoleum. Once again, hack away at the skull barnacles on its feet to bring it down. This time, it’ll shoot you with ranged attacks, so be ready to dodge not only its feet, but magic bolts coming at you.

Castle Sol Main Gate (Mountaintops of the Giants)
Right next to Castle Sol’s gates will be the sixth Mausoleum. Slash away at the barnacles to bring it down.

The Nameless Eternal City (Deeproot Depths)
The final one can be encountered underground. Unlike most other Mausoleums, you will have to use the roots around it to climb onto the thing while it’s still in motion. The barnacle skulls will be on its upper body compared to the legs. Clear enough of them to bring it down.
Once you’re there, the Elden Ring Walking Mausoleums can be used to duplicate remembrances.
If you’ve played the Souls series before, you’ll be very familiar with this concept: they’re boss souls. In Elden Ring, they can be used to “squash” into raw runes (souls) for leveling up for buying items, or you can transmute them into one of two items at the hub area (usually a weapon, or a spell).
Good luck! The Walking Mausoleums are super easy to spot, and now that you know the trick, you can bring them down.


